

Lesson 4

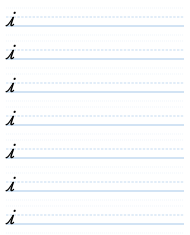
Now we have done that, we are ready to start on our first letter. So we have the first part of it already: light up, dark down, and then we tick away very quickly, like a flick, at the bottom.
Now, usually when we're connecting letters, we would make a longer stroke. But if the i was at the end of a word, we would just have a little flick at the end, like this. So we're just doing an isolated i, standing by itself, a small i.
So what you need to do is copy this: light up, dark down, and then flick away at the bottom. The thing to remember: all the same height, all the same slope, and light on the way up, dark on the way down, and then flick away, light up again. Keep them an equal distance apart, and then check with your ruler that you have the angles all the same.
Check that the line of the i is straight, and check that you don't start the curve, the little flick at the bottom, too soon. It must flick just as you hit the bottom line, not below it. So you don't want your letter to drop below that line, and you don't want it to go above the line either.
So there are a lot of things to control, and they are very difficult. So we're going to make many, many of these until they are perfect, because most of the letters are made out of two strokes. They're made out of c's and i's. So if we can get our i's perfect, and later on, when we come to the c's, we get our c's perfect, then we can join all these together in different combinations and make all of the letters of the alphabet. But we need to get our i's absolutely perfect.
So you can put a dot on your i, or you can put a little dash on the top of the i, but do not draw a circle on it. So a dot or a little dash, but no empty circles on top of your i.
You may wonder why there is a dot on the i. And the reason for that is that in cursive writing, if you make the letter u, it just looks like two i's. And so you have to dot the i's, to make sure that two i's together don't make a u. That's why the dot is there. So don't forget the dot.
If you're writing a word, you don't put the dot on it while you're writing, and you don't cross your t's while you're writing. You get to the end of the word, and then you go back, and you dot your i's and cross your t's. That's how we do it.
So you're going to continue to do this, rows of i's, until they are perfect.
Things to watch out for. Make sure your i stays straight. You can check that with your ruler. The dark down line must be straight, and you only bend it a tiny bit right before it hits the bottom line. I'm going to repeat this many, many times, because what will happen is that if you're not careful, you will get a bend in your i. And if your i gets a bend in it, then it starts to look like the letter c.
So we need to be careful about these things, because of when we're reading fast, or when we start writing fast later on. In the beginning we're going to go really slow and make everything perfect, but afterwards you're going to develop your own style of writing, and it's going to change. But if you have good foundations, then people will be able to read your writing.
If you don't have good foundations now, then later on, when you speed up and develop your own style, your writing starts to do all kinds of strange things, as it does when you write a lot. If you don't have good foundations, no one will be able to read your writing. You might not be able to read your own writing, and that would be unfortunate.
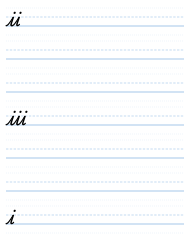
Next, we are going to connect some i's. So the exercise will be to connect, firstly, just two i's, and we make a row of those. If you can get them with the same angle and with the same distance apart each time you do it, then you are ready for the next exercise.
So what I'm going to do: we're going to leave you three lines, because that should be enough, to do two i's connected. Then, after two lines of practice of that, we'll do three i's connected. So you do light up, dark down, light up, dark down, light up, dark down, flick away. And you repeat: light up, dark down, light up, dark down, light up, dark down, flick away at the end.
Check with a ruler that everything is lined up nicely; that your i's don't go below the line, and that they don't go above the line; that your flicking away at the bottom is right just before it hits the bottom line, and not too soon before; that your i's are straight; and that you're going light on the way up and dark on the way down. And check with a ruler that your angles are lined up.
Then, after you've done that, we will just give you a line with one i at the beginning, and your job is to fill that whole line with i's. Now, these i's need to be the same angle and the same distance apart. It's harder than it seems. Good luck.
Cursive — Part One: The Small Letters · Evan Millner · Published by Abecedaria Press